


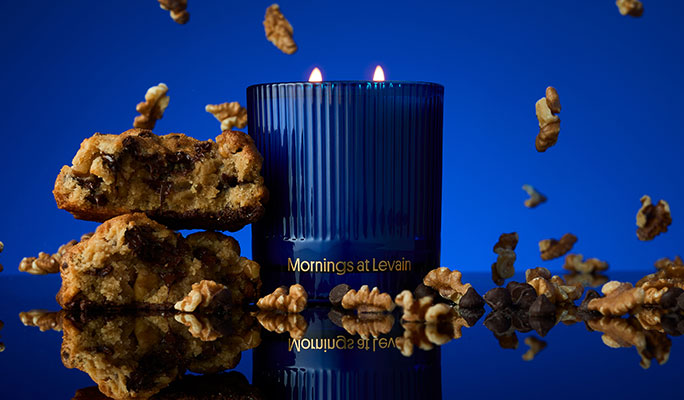


Lighting a candle can transform any room into a warmer, brighter, cozier space while smelling amazing, too.
You may light your candles with little thought — all it takes is a quick flick of a lighter — there really is a correct way to burn them. When you burn your candles the right way, you'll enjoy a brighter flame, longer burn, and an even easier re-light you didn’t know was possible.
We want you to get the most out of your favorite Snif candles, so today, we're going over everything you need to know about burning scented candles the right way.
How To Burn Your Candle the Right Way
Candles are made to burn… but that doesn’t mean you should just light ‘em and leave ‘em.
Here are some of our best candle-burning tips to help you get the most out of your favorite scents.
Don’t: Burn Candles for Too Long
It’s obvious that burning a candle too long can be a definite safety hazard, but did you know it impacts the life of your candle, too?
Carbon can collect on the wick when you burn your candle for more than four hours, and those carbon deposits can end up causing a “mushroom” effect that leaves the wick unstable.
If this happens, your candle flame will get too big and begin to smoke. Soot will go into the air (and onto your walls, too), and you won’t get that perfectly relaxing candle experience you’re looking for.
Do: Burn Long Enough To Melt the Wax Evenly
On the flip side, you also don't want to blow out your candle too soon. Instead, make sure you wait until the top layer of candle wax melts all the way to the outer edges. Then, and only then, is it time to blow out your candle!
Depending on how big your candle is, it can take quite some time for the wax to melt evenly all the way across. That’s why it’s best to light candles when you know you have the time to kick back and relax, and not when you’re hurrying out the door.
If you’re on the go and don't have time to wait, hold off until you get home for the day. Burn your candles in a rush, and you risk tunneling, which is when the wick sinks lower and lower into the candle, forming a “tunnel” of wax.
If you’re looking at your current candles and seeing a tunnel, don’t fret. There’s an easy way to fix it — take your hair dryer on the “low” setting, and run it around the areas of your candle with unmelted wax.
Don’t: Burn a Candle Near Moving Air
We hate to break it to you, but it’s also key to avoid burning your candles near an open window, indoor air vents, fans, and air conditioners.
When the air is moving, the flame will also move, and you just might end up with a big black stain on the container your candle is in. If you’re a DIY-er who loves to save empty candle jars, this is sure to hinder your crafting plans… and ruin your candle aesthetic in the meantime.
Do: Experiment With Different Scents
For a more fun and unique candle experience, try burning more than one candle scent at the same time. It’s like layering your favorite fragrances, but in candle form!
Ideally, try burning two scents that complement each other for the smoothest scent. Snif's Instant Karma and Half Baked Pumpkin Smash both feature cardamom along with a mix of warm, inviting ingredients — and when you burn them together, you turn your home into a cozy autumn escape.
Don’t: Burn Candles With Debris in Them
Your candle likes to keep things clean, so always remove any debris from the wax before burning your candle. If there is any dust or debris hanging around, it can contribute to flame flare-ups, uneven burning, and soot.
Scrape away any black specks you see before lighting for an easy breezy burn.
Do: Place Candles on an Even Surface
Let’s get one thing straight: no one wants their candle to fall over and burn the house down, and that’s probably (definitely) the single most important reason to burn your candle on an even surface.
But beyond all things “Honey, I burned the house down,” placing your candle on an even surface will also help prevent the wax from pooling on one side.
When To Stop Burning a Candle
Although you might want your favorite candles to burn forever, it’s important to know when it’s time to call it quits and retire your candles.
Generally speaking, a good rule of thumb to keep in mind is that you should stop burning your candle when only a quarter to a half of an inch of wax is left in the container.
How To Care for Your Candle
Now that you know the dos and don'ts of burning your candles, let's talk about some basic candle TLC.
Trim Wicks Before Burning
It’s best to trim your candle wicks before lighting them every time. Yes, every time.
The rule of thumb is to keep your wick trimmed anywhere from 1/8 to 1/4 inches long. Trimming the wick will give you a brighter, cleaner flame and a way prettier candle-lighting experience.
If you don't trim the wick, the burn will be dull, and the flame will be a weird shape instead of that perfect teardrop you see on Pinterest. If you’re a new candle lover and don't have a wick trimmer on hand, scissors or nail clippers will get the job done, too.
Opt for a Lighter
There’s something charming about lighting your candles the old-school way by striking a match, but it may be best to opt for a lighter.
Matches make it easy to burn your fingers when trying to light a wick, and a lighter with a long, flexible neck is one of the safest options.
You can even get opt for an electric candle lighter — these lighters are the safest to use, so you'll never be in danger of burning yourself. Plus, lighters with long necks make it much easier to reach your wick once you’ve burned your candle halfway down the jar.
How To Store Your Candles
Even when it’s time to retire your go-to winter smells for a fresh spring scent, there are ways you can protect your candles when they’re not in use.
Keep Candles Out of Direct Sunlight
Storing your candles properly is important if you want them to last. You want to avoid keeping your candles on a window sill that gets direct sunlight. If it gets warm enough, candles will get soft, bend, or melt together if they aren't in jars or tins.
You want to keep your candles in an area where they will stay at room temperature. The sunlight will also make your candles lose color and make the custom fragrance fade faster. Any candles you aren't using can be stored in a cupboard or dark space to preserve them.
Keep Candles Away From Heat or Cold
You don't want to keep your candles where they can heat up or get cold. For example, keeping a candle on the stove while your oven is on can cause the wax to melt from the bottom, which will affect the burn time.
You also don't want your candle to be somewhere the wax can get really cold. The fragrance won't be as strong, and the melted wax can unevenly cool. Your candle may also sweat if it's been exposed to heat or cold, which you’ll see when water droplets appear on the surface of the wax.
What About Candles With Multiple Wicks?
Our favorite larger candles need a little extra TLC to make sure that you’re getting the most out of every burn. There are a few reasons we like these types of candles — for one, if you don't have the time to wait for the top layer of wax to melt, multi-wick candles will be your new favs.
The multiple flames heat the surface faster, so keep in mind that you'll get a quicker melt when burning a multi-wick candle. They also disperse their fragrance more quickly into the room, so they may be best in larger spaces for a gentle, subtle smell.
When you have a multi-wick candle, try to avoid only lighting one wick at a time. The wax burning around that single wick will often cause much-dreaded tunneling, and the wick will end up way, way down in the candle.
Ideally, the only time it might be okay to have one wick burning is if it's in the center of the candle. Otherwise, aim to light all of the wicks for the perfect, even burn.
Find Your New Favorite Candle
There's nothing better than a relaxing evening with a newly lit candle… as long as you’re burning it properly.
Now that you know the type of TLC your candle needs so it can give you the TLC you deserve, check out Snif’s incredible scents in our 4-wick and one-wick candles. Our larger candles have an impressive 200+ hours of burn time for the ultimate chill sesh, wind down routine, or bedtime zen.
Sources:
You've been burning candles wrong your whole life | Business Insider